

Move tool
The most important transfer tool in Photoshop is the "Move Tool". As the name suggests, this tool is used to move around. The keyboard shortcut for this tool is the letter "V".
With this tool you can move an image layer. Or move part of a layer using the Select tool. By holding down the "Alt" key and moving a selected layer or environment with the "Move" tool, you can get a copy of your selection.
If you hold down the "Shift" key while moving with the "Move" tool, the image will move horizontally and vertically. If you want to activate this (Move) tool when working with other tools, simply press the "Ctrl" key.
After selecting an image layer with the "Move" tool, you can move it with the arrow keys. Note that a 1-pixel image is transmitted each time the arrow keys are pressed.
If the working space is large or the image transfer distance is large, the transfer may take a long time. If you hold down the "Shift" key while moving with the arrow keys, you will move the image 10 pixels each time.
In Photoshop, whichever tool you choose, this tool has a number of settings. Most of these settings appear in the "options bar" (at the top of the worksheet).
Auto selection
Well, in the "options bar" section, when you select the "Move Tool", the first option is "Auto Select". If this option is enabled, you can select it by clicking on a layer. If this option is not enabled, you can only select via "Levels" in the "Panels" section.
The "Levels" section is located in the lower left corner of the software and its task is to manage the levels. Using this section it is possible to view all the levels of a project and copy them and….
Of course, don't forget that the position of the tool in Photoshop can be changed and this section may be different for you. There is a drop-down menu in front of the "Auto Select" option in the "Options Bar".
This drop-down menu includes two options "Level" and "Group". This refers to the concept that the "Move Tool" makes automatic choices based on level or group.
Suppose multiple photos are in the same group. If you select the "Layer" option and select one of the photos, only the same photo will be selected. But if you select the "Group" option, selecting one of the photos, they will all be selected.
shows the transformation control
The next option in the "options bar" is the "show transform control" option. If you enable this option, a box will be drawn around each selected layer.
The good thing about this tool is that you can easily change the length and width of the layers. Or you can easily rotate a layer. Another advantage of this option is that you can see the environment of your level.
Where the start and finish of each level are in big projects can help you a lot.
Alignment and distribution of the layers
The most important use of the "Move Tool" is the alignment and distribution of layers. Alignment means leveling and distribution means adjusting the distance between the layers. If you look closely at the "options bar" section, you will see that the software itself has separated the alignment and distribution tools.
There are three points in the "options bar" that if you click on it, you will see the alignment and distribution tools.
Align
Well, in our alignment software, we have six modes.
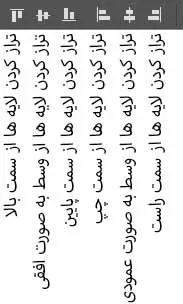
Defining these 6 modes is very simple:
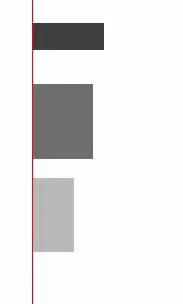
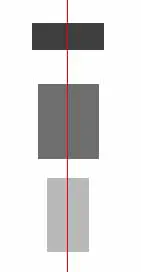
Align the layers from the right
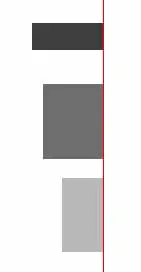
Align the layers from the left
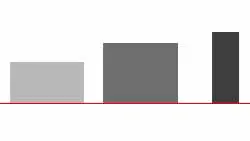
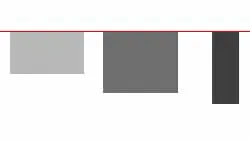
Line up the layers from the top
Line up the layers from below
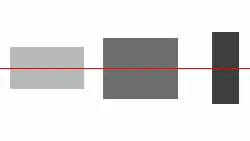
Align the layers vertically from the center
Align the layers from the center horizontally
Well, in Photoshop, you need to have at least 3 layers to line up different layers.
To do this, select three layers in the "Layer" section (simply hold down the "Ctrl" button and select).
After selecting the layers, the "Align and Distribute Layers" tool is activated in the "Options Bar" section.
 |
 |
 |
 |
 |
 |
To distribute
In Photoshop, like align, you have six distribution modes.
In this section, you must have at least three modules to use the Deploy tool.
Distribute is divided into the following six modes:
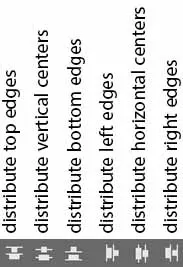
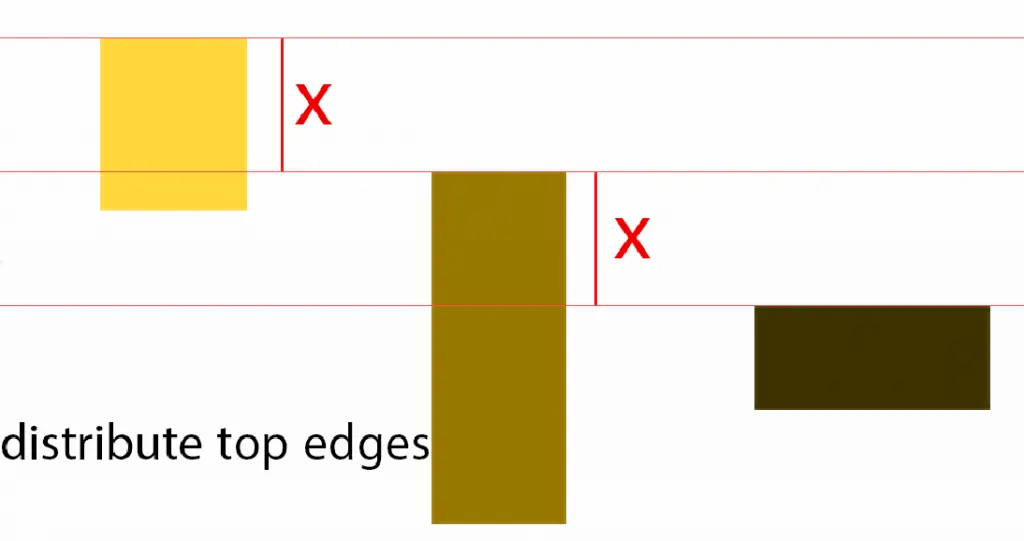
distribute the upper edges
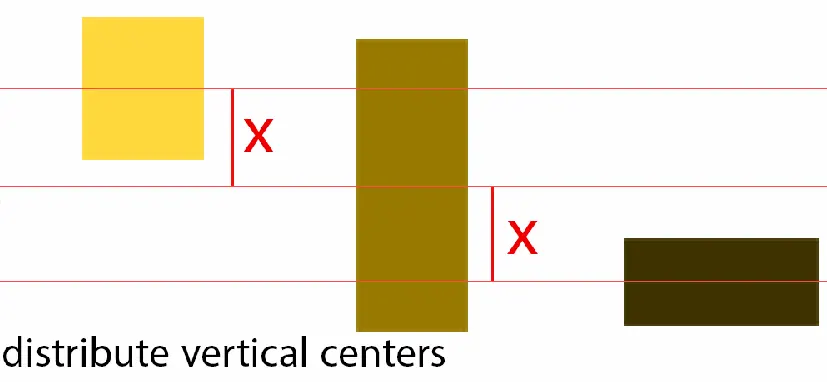
distribute the vertical centers
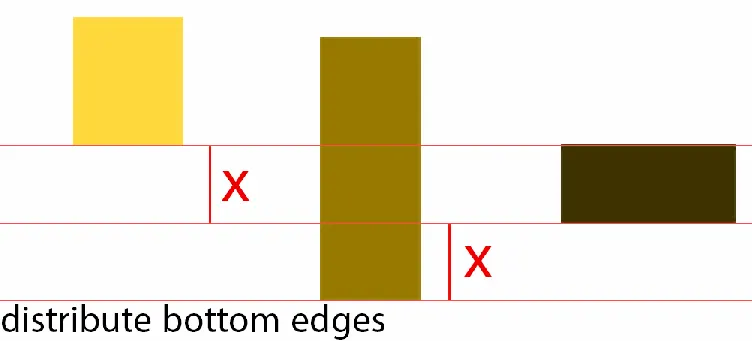
distribute the lower edges
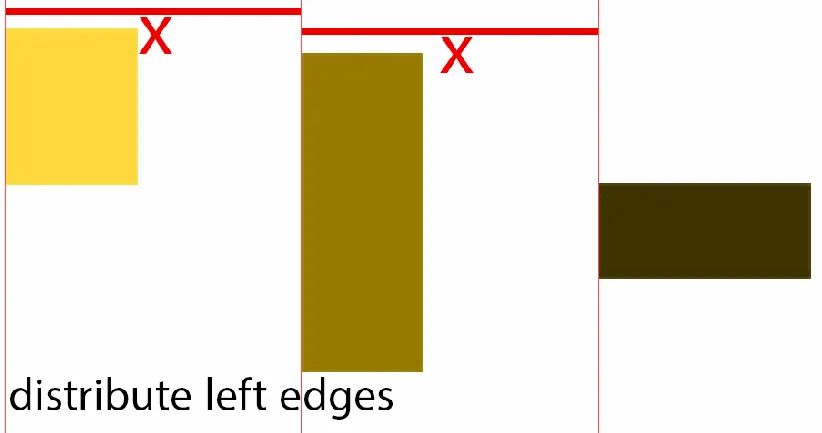
distribute the left edges
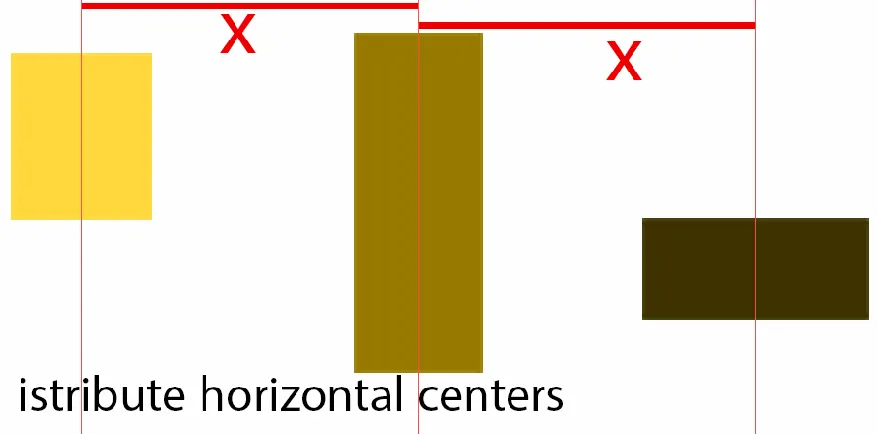
distribute the horizontal centers
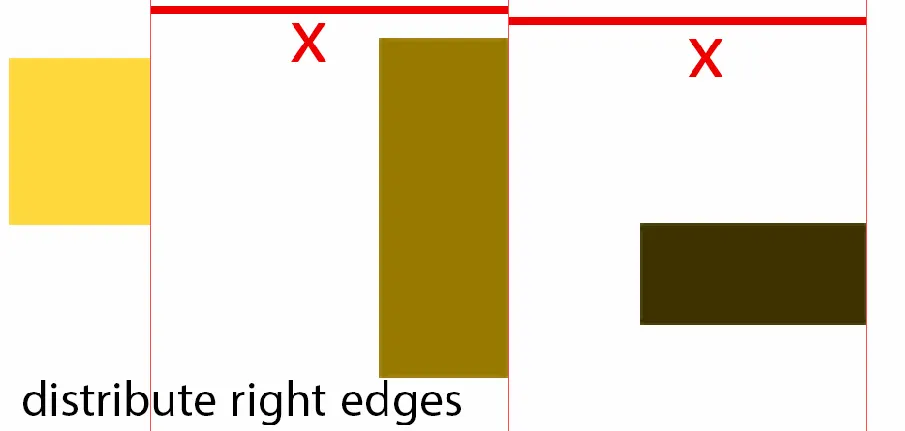
distribute the straight edges
As I explained above, to select multiple layers at once, select Multiple Layers in the "Layer" section.
All you have to do is hold down the "Ctrl" key and select the desired layers.
Once you have selected at least three image layers, the distribution options are activated.
.
 |
 |
 |
 |
 |
 |
3D mode
In the continuation of the transfer tool in Photoshop, in the "options bar" section, there is also a block called "3D mode".
Using this section requires a basic understanding of the entire Photoshop environment.
So I'm not going to get into this part of the software right now.
If you have any questions about this article (transfer tool in Photoshop), ask via the comment section.